Invoicing by Vendors
You can create Invoices in USD in three different ways:
- Create your Invoice from Work Orders
- Upload an Invoice from Invoices Page
- Create your Invoice in USD without Work Orders (via Invoices Page)
You can also view a video walking you through invoicing your Clients.
Creating Invoices in USD by Vendors
Creating Invoices in USD is fairly similar to creating Invoices in foreign currencies.
Start by logging in to Liquid.
- Once you are logged in, go to Work Orders on the left side.
- Select your active Work Orders.
- At the top of the Work Orders, click on Here are actions you can take for this Work Order.
- If you have an hourly deliverable, you must enter hours into the time tracker. If your deliverable(s) are not hourly, then entering hours in the time tracker is optional.
- When you have completed time tracking, press the + Invoice button.
- A draft invoice will be generated based on the agreed-to terms of the Work Orders and the hours you have tracked — all amounts will be in USD. If you have hit your maximum hours cap for the deliverable, your additional hours tracked will not be added to the Invoice.
- If your deliverable(s) are based on a daily, weekly, monthly, or quarterly rate, you will be required to enter in the number of days/weeks/months/quarters you worked for this Invoice. All amounts will be in USD.
- If needed, you can add additional line items to account for additional pre-agreed expenses, or you can delete the auto-generated line items and create your own. Again, all amounts will be in USD.
- Note that using the auto-generated line items will allow the system to mark your Invoice as matching your Work Order. If you have added additional items or deleted the auto-generated items and recreated them, your Invoice may be marked with a warning that the Invoice does not match or cannot be matched. This warning will not prevent you from sending your Invoice, nor will it prevent your Clients from paying your Invoice.
- The Invoice total will automatically be calculated and will be shown in USD.
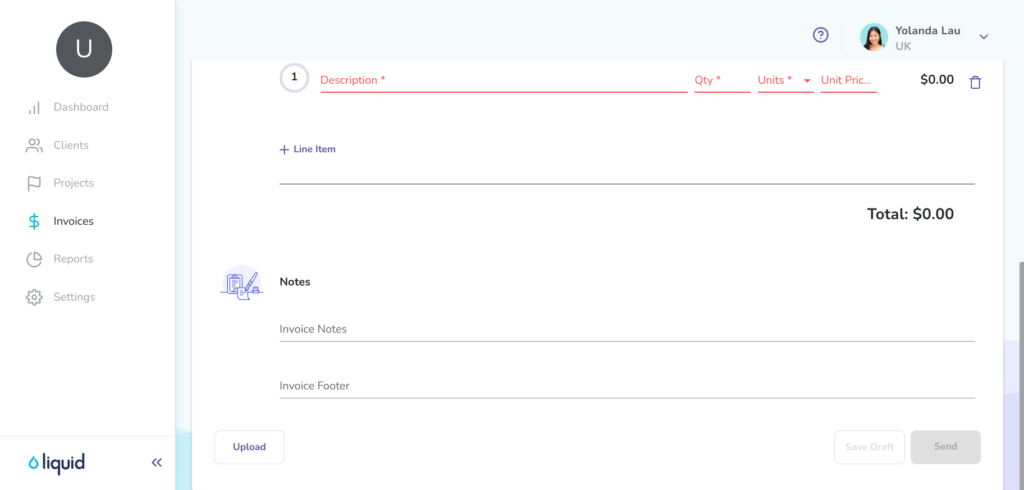
- If you’d like, you can also enter Invoice Notes and/or an Invoice Footer. In addition, You can also add an Invoice Period of Performance Start date, and an Invoice Period of Performance End Date. These fields are optional when sending an invoice to an existing Client using Liquid, but are required when sending an invoice via email (typically to a Client who is not a Liquid user).
- Press Send in the bottom right corner to send the Invoice to your Client.
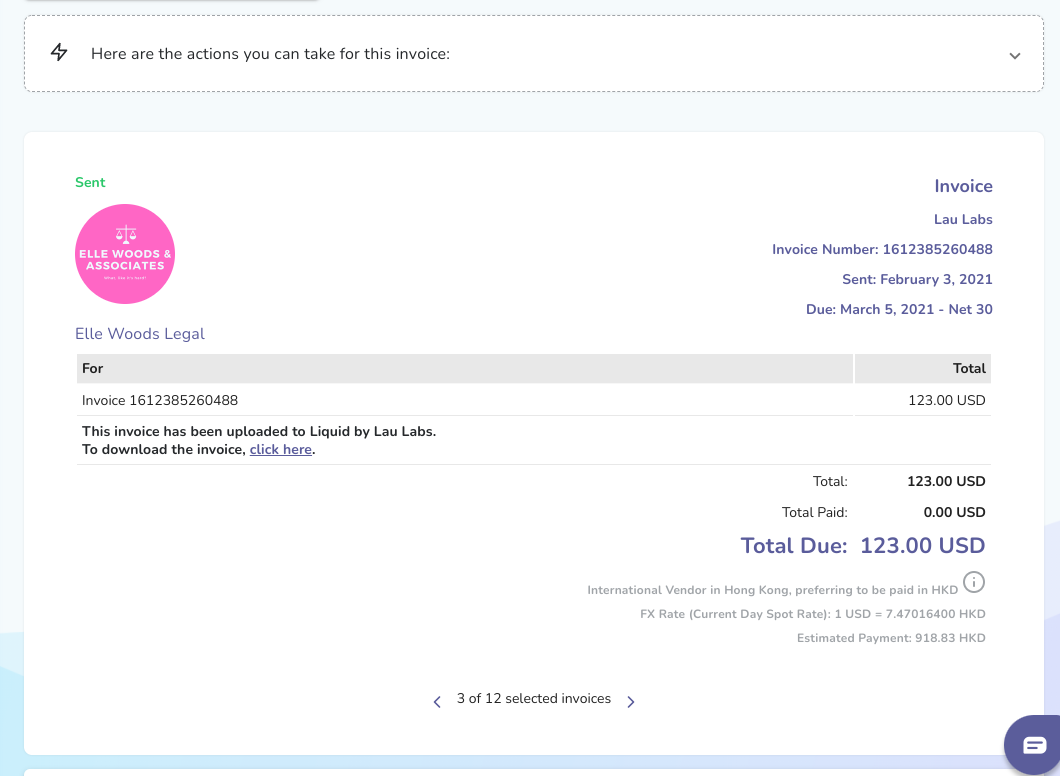
The invoice will then be sent to your Client, who can then pay the invoice. Note that once an Invoice is created in a currency, it can’t be changed to another.

If you have selected to be paid in your local currency, an estimated USD amount will be shown on the sent invoice, along with the FX rate. At the time the payment is made, the USD amount will be locked given the invoice amount in local currency and the FX rate at that time.
Uploading Invoices in USD by Vendors
Uploading Invoices in USD is fairly similar to uploading Invoices in foreign currencies.
Start by logging in to Liquid.
- Once you are logged in, go to Invoices on the left side.
- Press the + Invoice button.
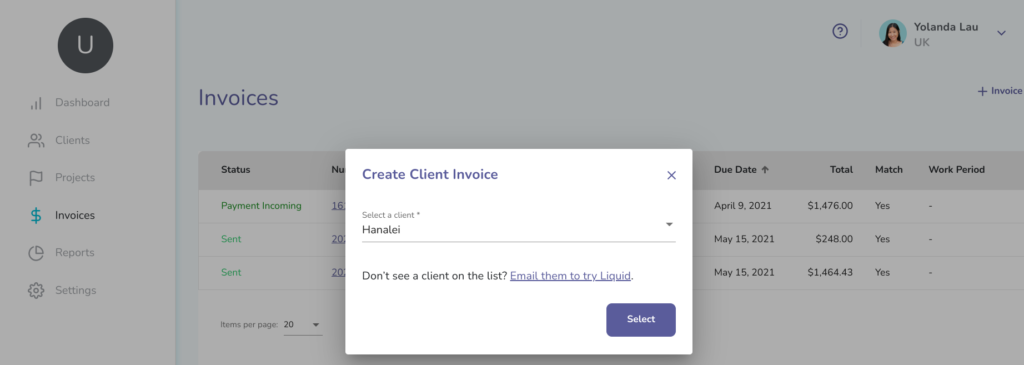
- You will be prompted to select a Client.
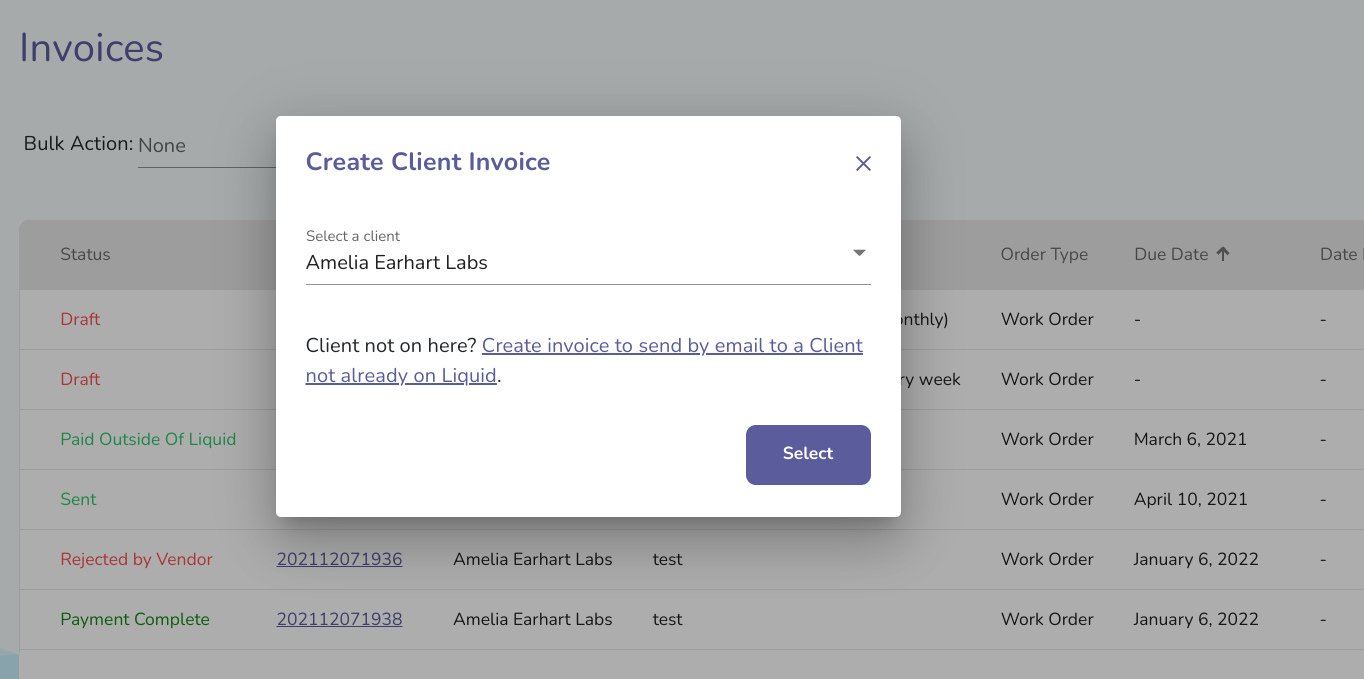
- Then you will be prompted to select a Work Order. Clicking Create the invoice without it to get a blank invoice creation form with your name and your Client’s name pre-filled. In addition, the payment terms will be pre-filled. Contact your Client if you’d like to modify payment terms, as the Client will need to make that change.

- Press the Upload button at the bottom left of the draft invoice. The draft invoice will then be discarded (you will have to confirm discarding the invoice), and then you will be navigated to a window to help you upload your Invoice.
- Upload the file (acceptable file types are PDF, DOC, DOCX, or image files with a maximum size of 32MB).
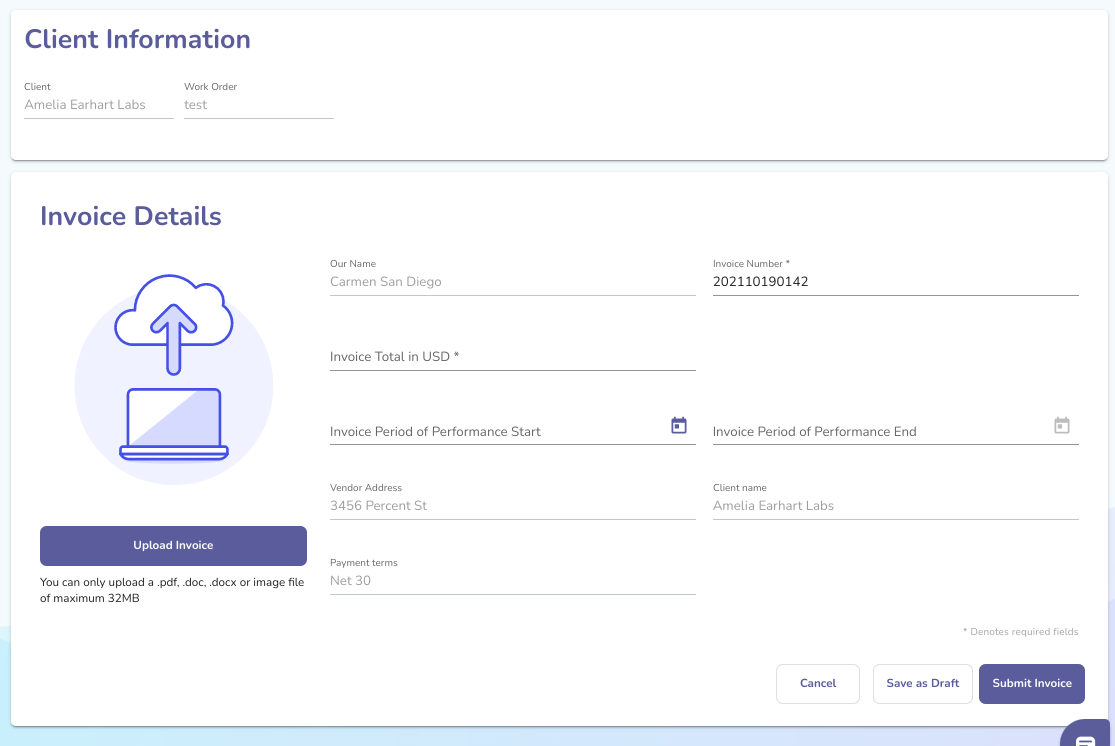
- Then, enter the invoice details — Invoice number and Invoice total (total amount invoiced in USD). An invoice number will be pre-populated, but you should adjust this manually to match the actual invoice number from the invoice.
- You can also add an Invoice Period of Performance Start date, and an Invoice Period of Performance End Date. These fields are optional when sending an invoice to an existing Client using Liquid, but are required when sending an invoice via email (typically to a Client who is not a Liquid user).
- Press Submit Invoice to complete the Invoice upload.
The invoice will then be sent to your Client, who can then pay the invoice.
If you have selected to be paid in your local currency, an estimated USD amount will be shown on the sent invoice, along with the FX rate. At the time the payment is made, the USD amount will be locked given the invoice amount in local currency and the FX rate at that time.
Create Invoices in USD without Work Orders via Invoices Page
While we highly recommend creating Invoices from Work Orders, you can invoice your clients without Work Orders. We recommend you ask your Client for approval to send invoices this way before doing so.
Start by logging into Liquid.
- Once you are logged in, go to Invoices on the left side.
- Press the + Invoice button.
- You will be prompted to select a Client.
- Then you will be prompted to select a Work Orders. Click Create the invoice without it to get a blank invoice creation form with your name and your Client’s name pre-filled.

- The payment terms will be pre-filled. Contact your Client if you’d like to modify payment terms, as the Client will need to make that change. If you want to Upload an Invoice without a Work Order, press the Upload button at the bottom left.
- Make sure to add a Description, Quantity, Units, and the Unit Price. Each total line item will be calculated automatically and will be presented in USD.
- Add additional line items as appropriate. The total invoice amount will be calculated automatically and will be displayed in USD.
- If desired, add Invoice Notes and/or an Invoice Footer. When sending invoices without Work Orders, it’s good practice to add detailed information about the Invoice in the Notes section.
- You can also add an Invoice Period of Performance Start date, and an Invoice Period of Performance End Date. These fields are optional when sending an invoice to an existing Client using Liquid, but are required when sending an invoice via email (typically to a Client who is not a Liquid user).
- Note that by creating your Invoice without a Work Orders, the Invoice will be marked with a warning that the Invoice cannot be matched. This warning will not prevent you from sending your Invoice, nor will it prevent your Clients from paying your Invoice.
- Press Send to send the Invoice to your Client.
The invoice will then be sent to your Client, who can then pay the invoice. Note that once an Invoice is created in a currency, it can’t be changed to another.

If you have selected to be paid in your local currency, an estimated USD amount will be shown on the sent invoice, along with the FX rate. At the time the payment is made, the USD amount will be locked given the invoice amount in local currency and the FX rate at that time.
Click here to learn how to send invoices to your Clients in foreign currencies, if that currency is available in Liquid.